As a 3D VFX and Digital Composition artist, I recently took on a project to create a disco-themed 3D VFX composition. The project required the use of the Arnold MOOM (Many Objects One Material) shading technique, which allows for the randomization of color textures on repetitive objects in a more efficient and streamlined manner. In this article, I will share my experience of creating this composition and how I used the Arnold MOOM shading technique to achieve the desired effect.
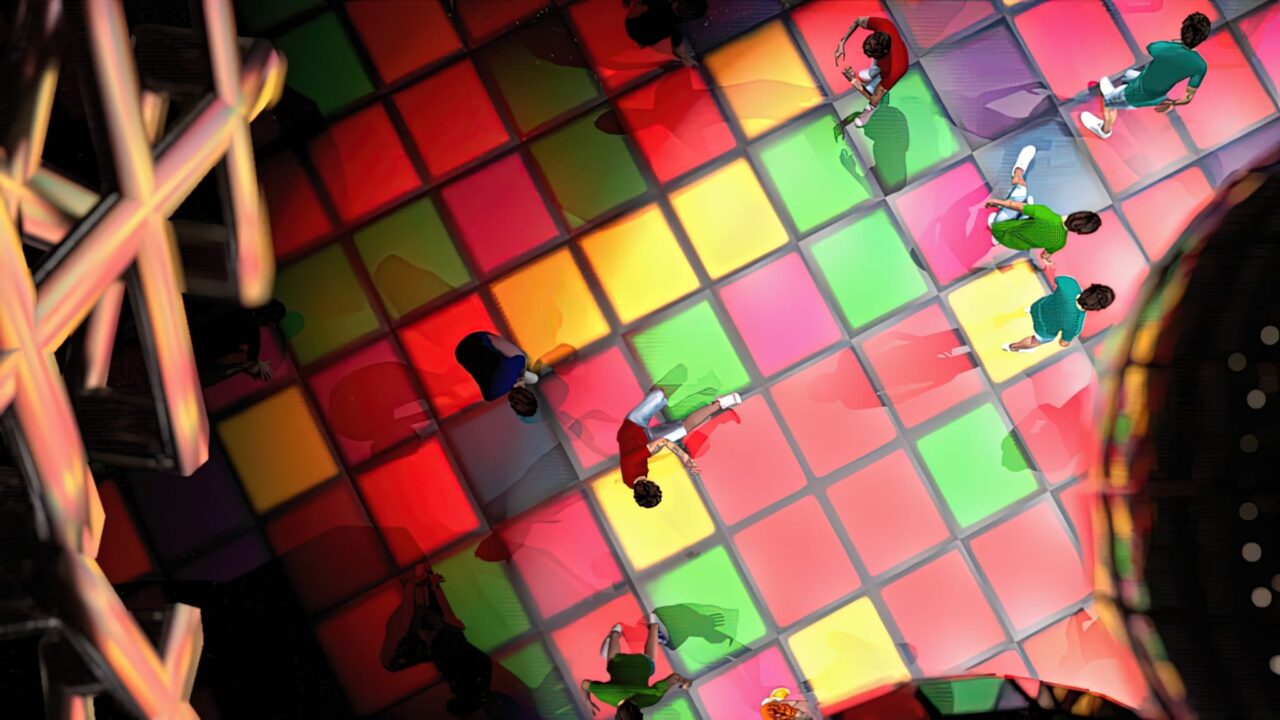
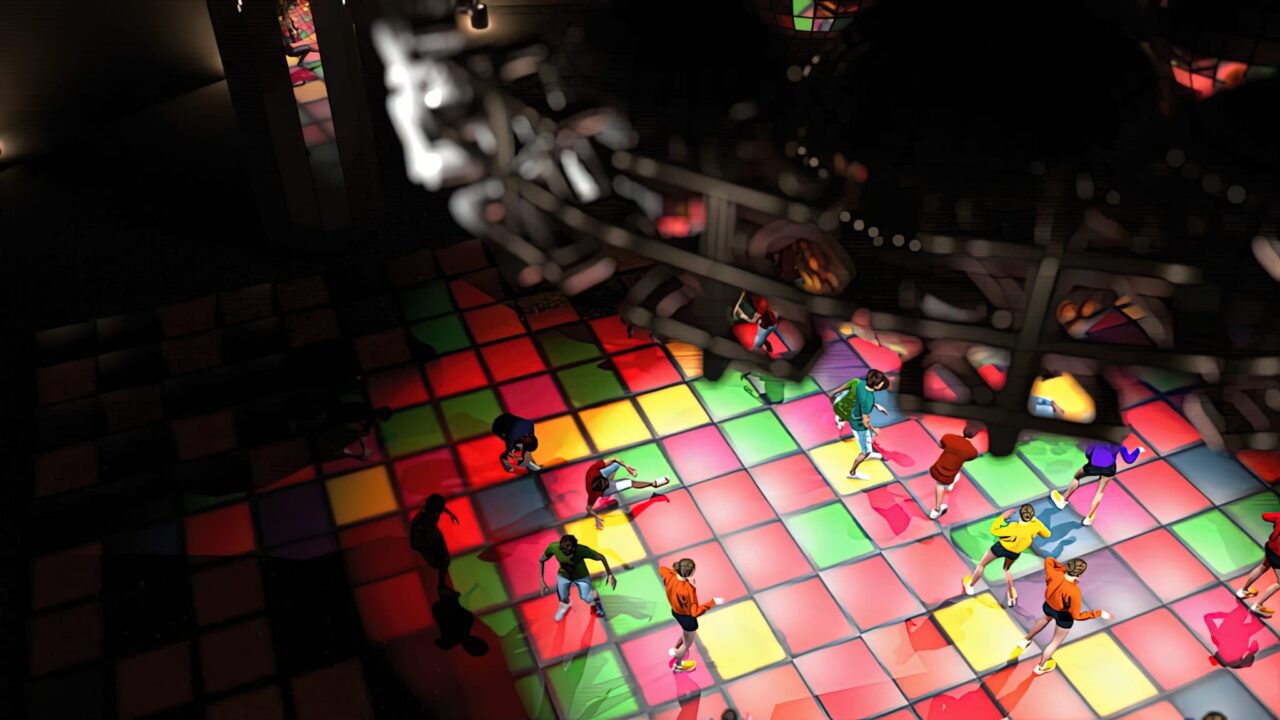
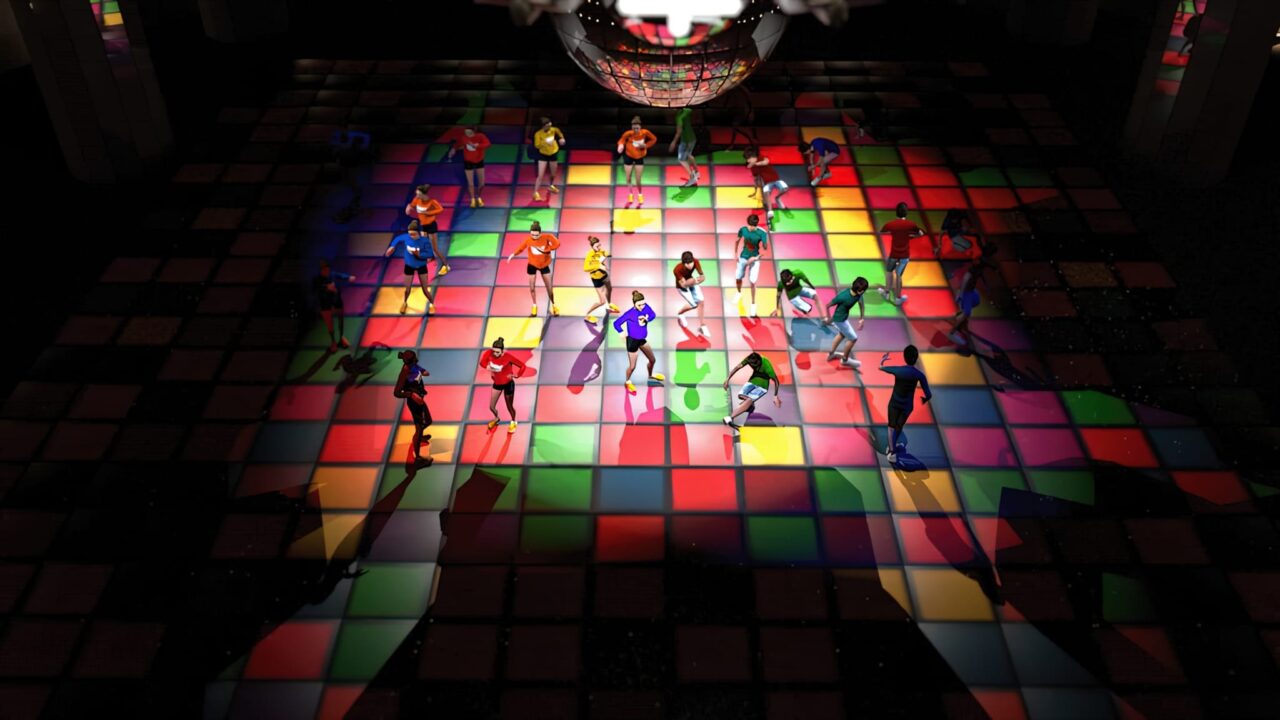
To create the disco-themed 3D VFX composition, I used the Arnold MOOM shading technique to randomize color textures on the dance floor and the color of the dancer’s outfit. This technique is very useful when dealing with scenes with repetitive objects, as it eliminates the need to create many shader nodes and link all textures individually.
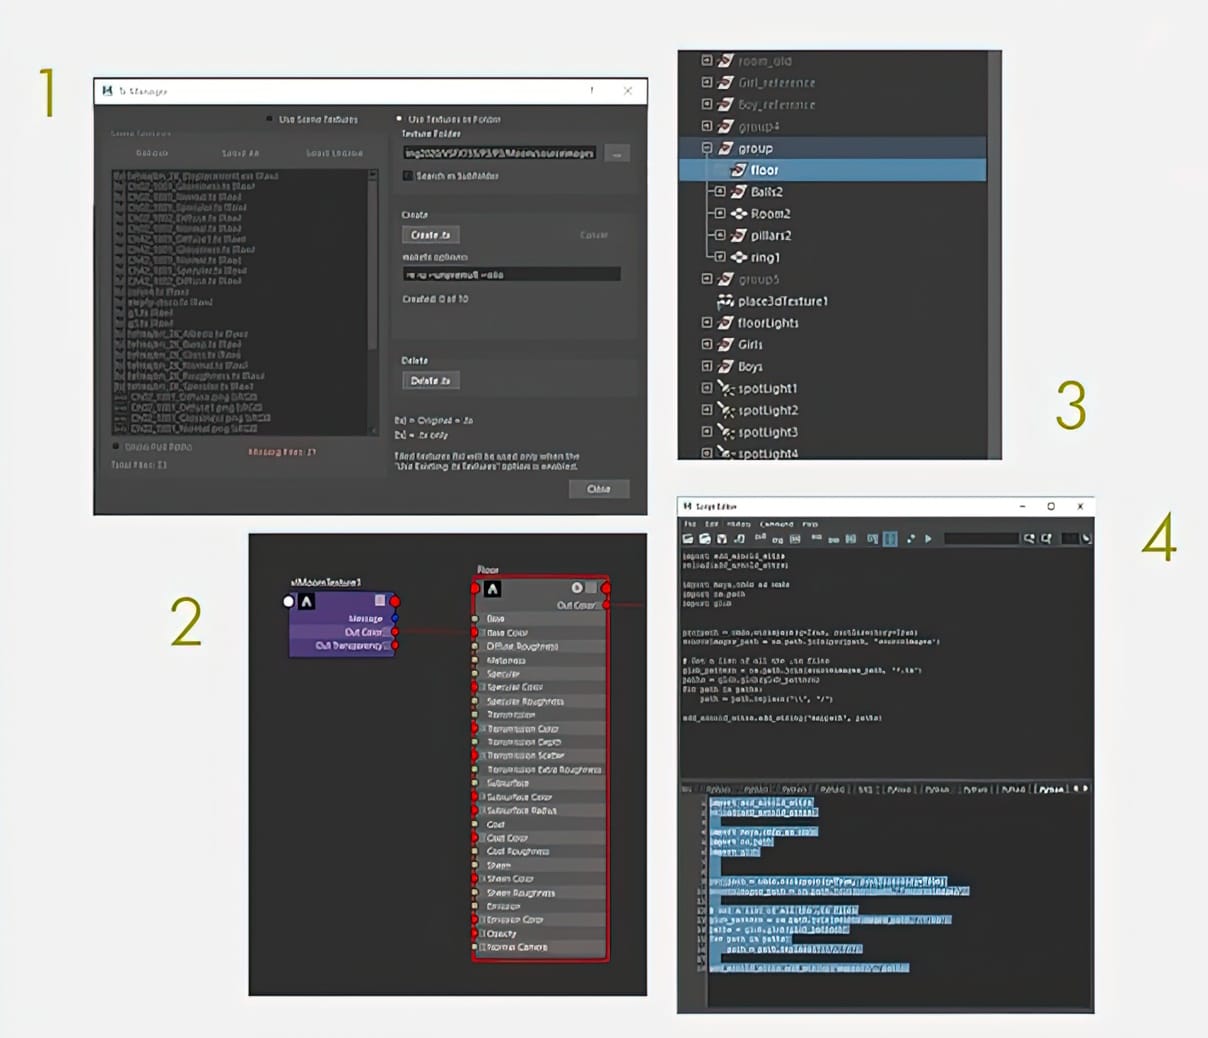
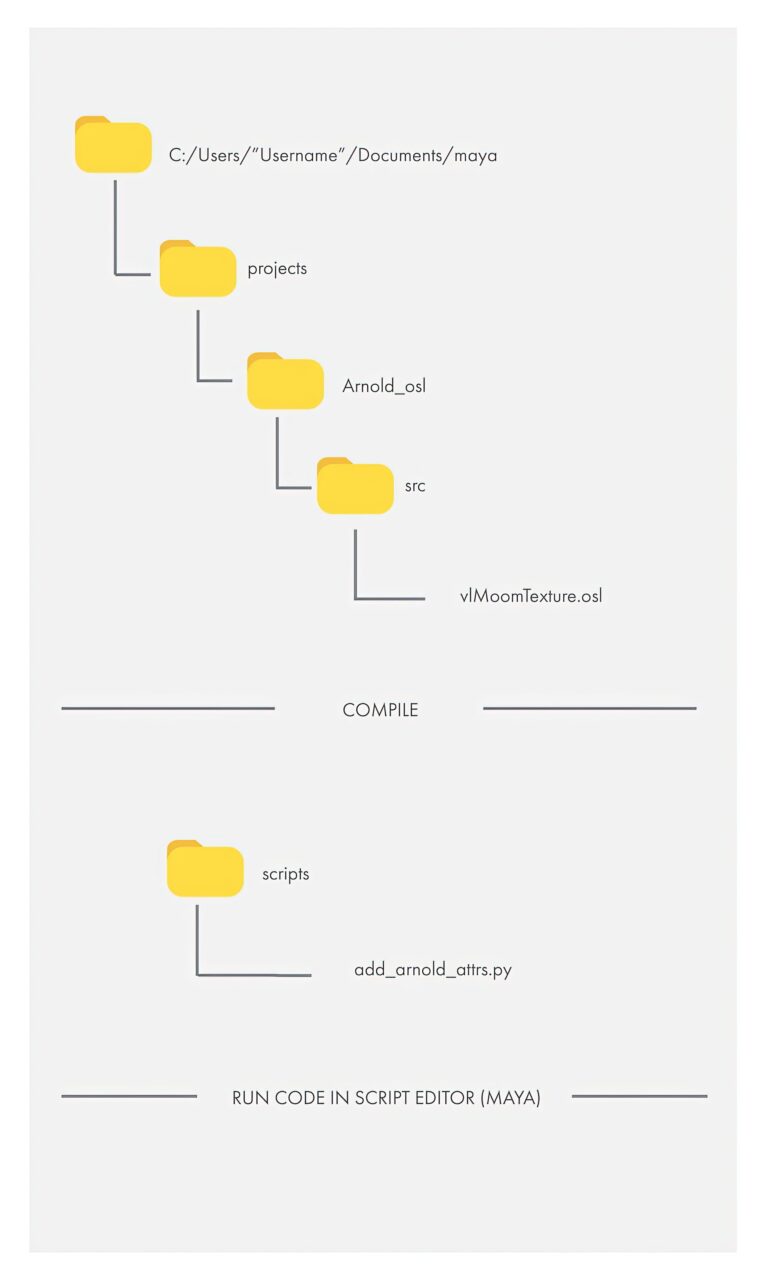
To create the Arnold MOOM shader, I had to organize my folder structure to ensure that the Maya could locate the “.osl” files and create the shader node. Additionally, I had to compile the “.osl” files before use, or they would not show correctly in the Hypershade. For this particular node, I also had to type in and run the assign textures code in Script Editor to make it work. The texture files also had to be converted to .tx files.
OSL: Arnold MOOM (Many Objects One Material) Shading
I used the MoomTexture node to randomize color textures on the dance floor and the color of the dancer’s outfit. This shader node is very handy when dealing with scenes with repetitive objects. Instead of creating many shader nodes and having to link all textures individually, this way is a lot faster.
To be able to create Arnold shaders, I needed two components installed: a script compiler (Cutter/visual studio) and the MtoA plugin. By using these components, I was able to edit the assigning code in Script Editor to change the sourceimages path. Overall, using the Arnold MOOM shading technique allowed me to create a visually appealing disco-themed 3D VFX composition in a more efficient and streamlined manner.
OSL: Arnold MOOM (Many Objects One Material) Shading
I used the MoomTexture node to randomize color textures on the dance floor and the color of dancer’s outfit.
This shader node is very handy when dealing with scenes with repetitive objects.
Instead of creating many shader nodes and having to link all textures individually, this way is a lot faster.
Next will be a brief breakdown of how I acheived the outcome.
Folder Structure
The picture on the left side demonstrate the folder structure which can make sure maya successfully locate the “.osl” files and create the shader node.
The .osl files has to be compiled before use otherwise it will not show in your Hypershade correctly.
For this particular node, you also have to type in and run the assign textures code in Script Editor in order to make it work.
And the texture files must be converted to .tx files.
Instructions of creating the Arnold Moom (Many Objects One Material) Shader
To be able to create Arnold shaders, you need these 2 components installed: a script compiler (Cutter/visual studio), and the MtoA plugin.
You can edit the assigning code in script editor to change the sourceimages path.
[At line 10 : sourceimages_path = os.path.join(projpath, ‘sourceimages/your folder’)]
For detailed instuctions, visit the website: http://www.fundza.com/cutter/osl/arnold/getting_started/index.html
Create one shader node with multiple textures
Convert your texture files to “.tx” files using TX Manager. (Arnold/Utilities/TX Manager)
Open Hypershade and type in the name of your Moom Texture node. (Mine is vlMoomTexture)
Select the group you want to apply the shader (Just the group, not the objects inside).
Turn on Script Editor (with the group selected) and run the assigning code.
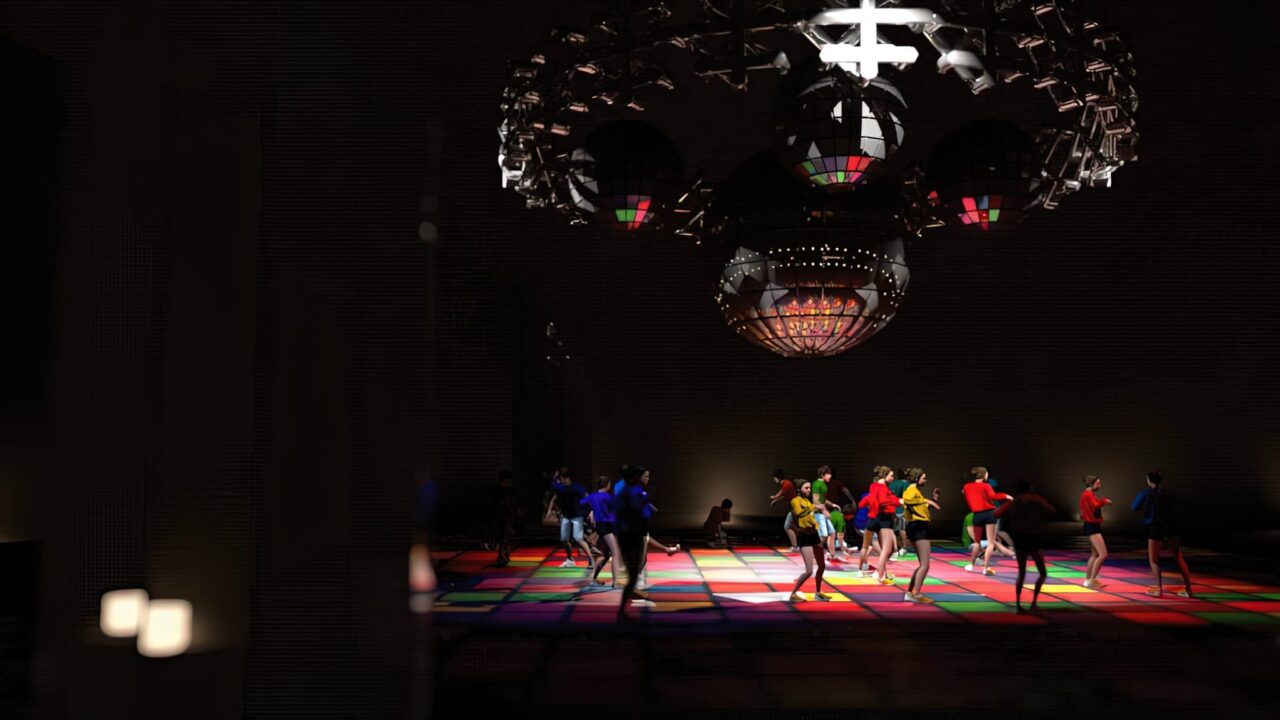
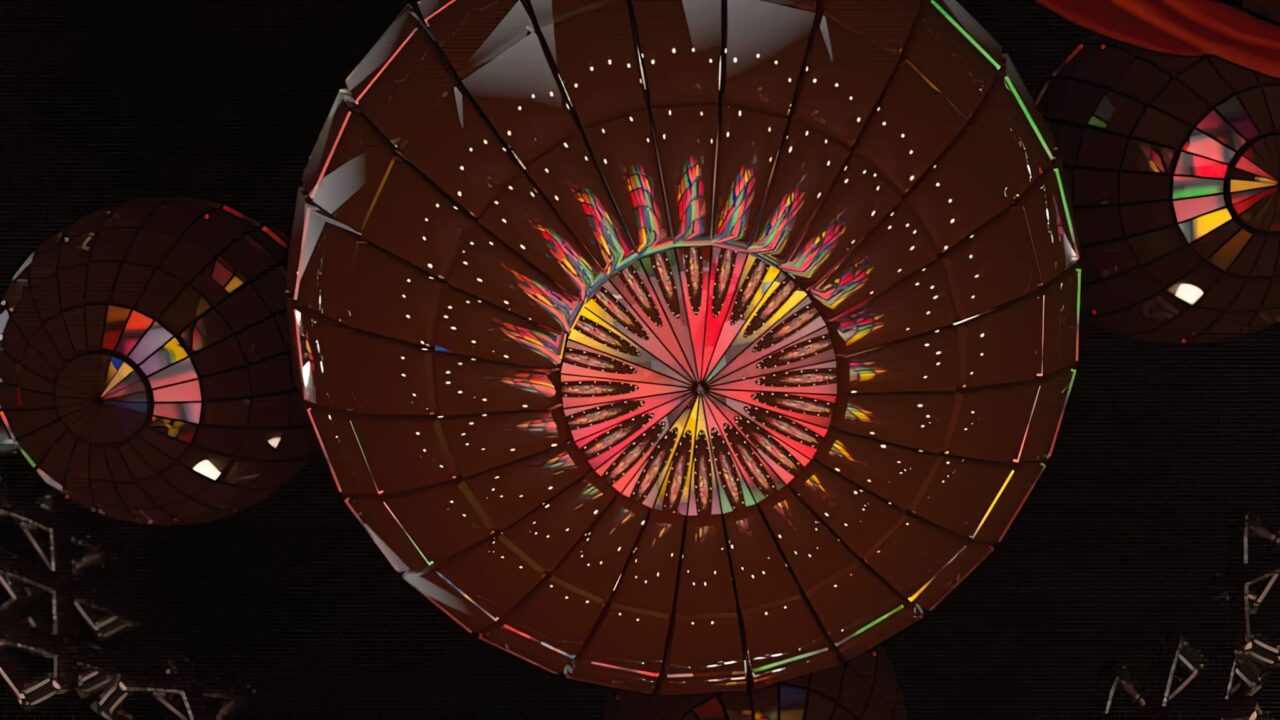
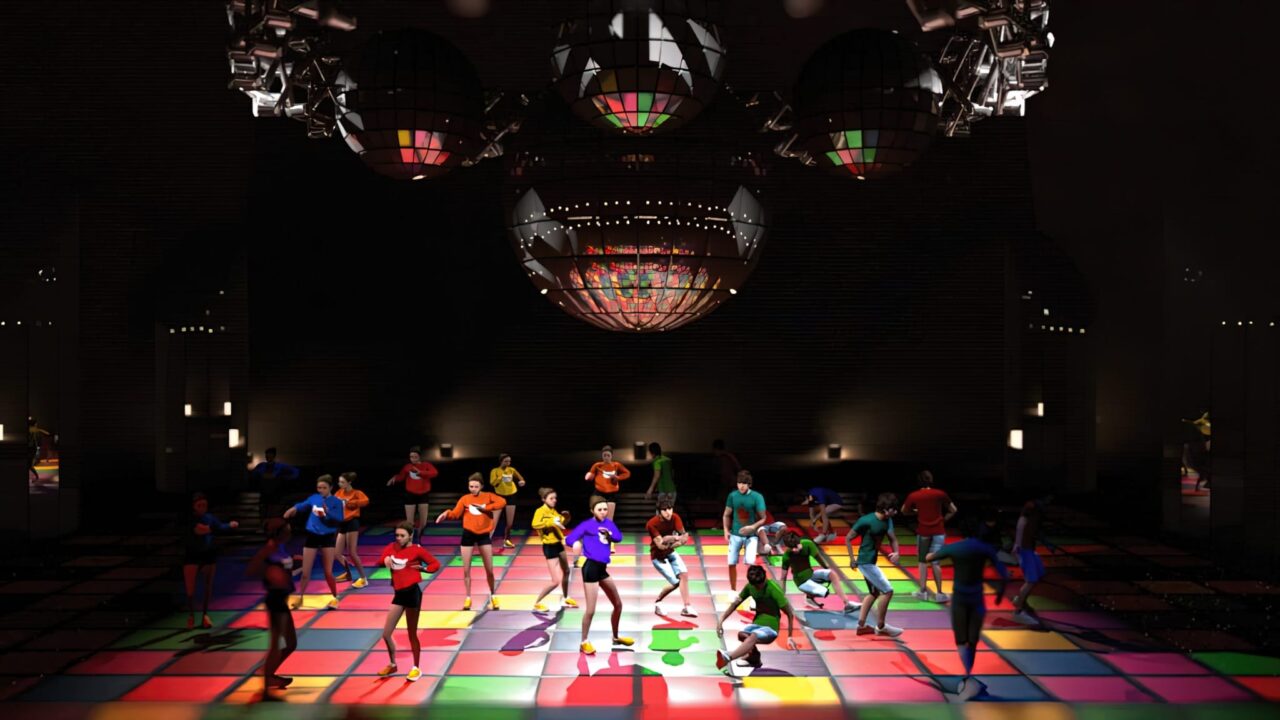
In this project, I created a disco-themed 3D VFX composition using Arnold MOOM (Many Objects One Material) Shading. The composition featured multiple dancers in different costumes and various dance moves, all set to a disco beat.
To achieve the desired effect, I used the MoomTexture node to randomize color textures on the dance floor and the color of the dancer’s outfit. This shader node is very useful when dealing with scenes with repetitive objects. Instead of creating many shader nodes and having to link all textures individually, this way is a lot faster.
To create the Arnold MOOM shader, I used Adobe Portfolio to organize my folder structure to ensure Maya could locate the “.osl” files and create the shader node. It’s important to note that the .osl files must be compiled before use, or it will not show correctly in your Hypershade.
For this particular node, I also had to type in and run the assign textures code in Script Editor to make it work. Additionally, the texture files had to be converted to .tx files.
To be able to create Arnold shaders, you need two components installed: a script compiler (Cutter/visual studio) and the MtoA plugin. You can edit the assigning code in script editor to change the sourceimages path. At line 10, the sourceimages_path can be modified by using this command: “sourceimages_path = os.path.join(projpath, ‘sourceimages/your folder’)”.
Overall, using the Arnold MOOM shading technique allowed me to create a visually appealing disco-themed VFX composition in a more efficient and streamlined manner.